Gravity Forms
Gravity Forms is third-party Wordpress plugin. The integration requires you to purchase any license that enables you to use the Webhooks plugin. At the time of writing, the only license that enables that plugin, is Elite.
This guide uses the free Gravity Forms demo hosted on a temporary Wordpress instance. At the time of writing, demo instances will be running for 14 days.
The result of this guide is a form that captures contact details and self-assessment responses, and transmits this data to the Candidate API via Gravity Forms' webhook feature. This will be performed within a demo WordPress installation supplied by Gravity Forms. We will submit a candidate for a study named "Genericazeram Demo". The sequencing of questions and input fields will mirror those of a widget configured for demonstration objectives.
1. Creating a form
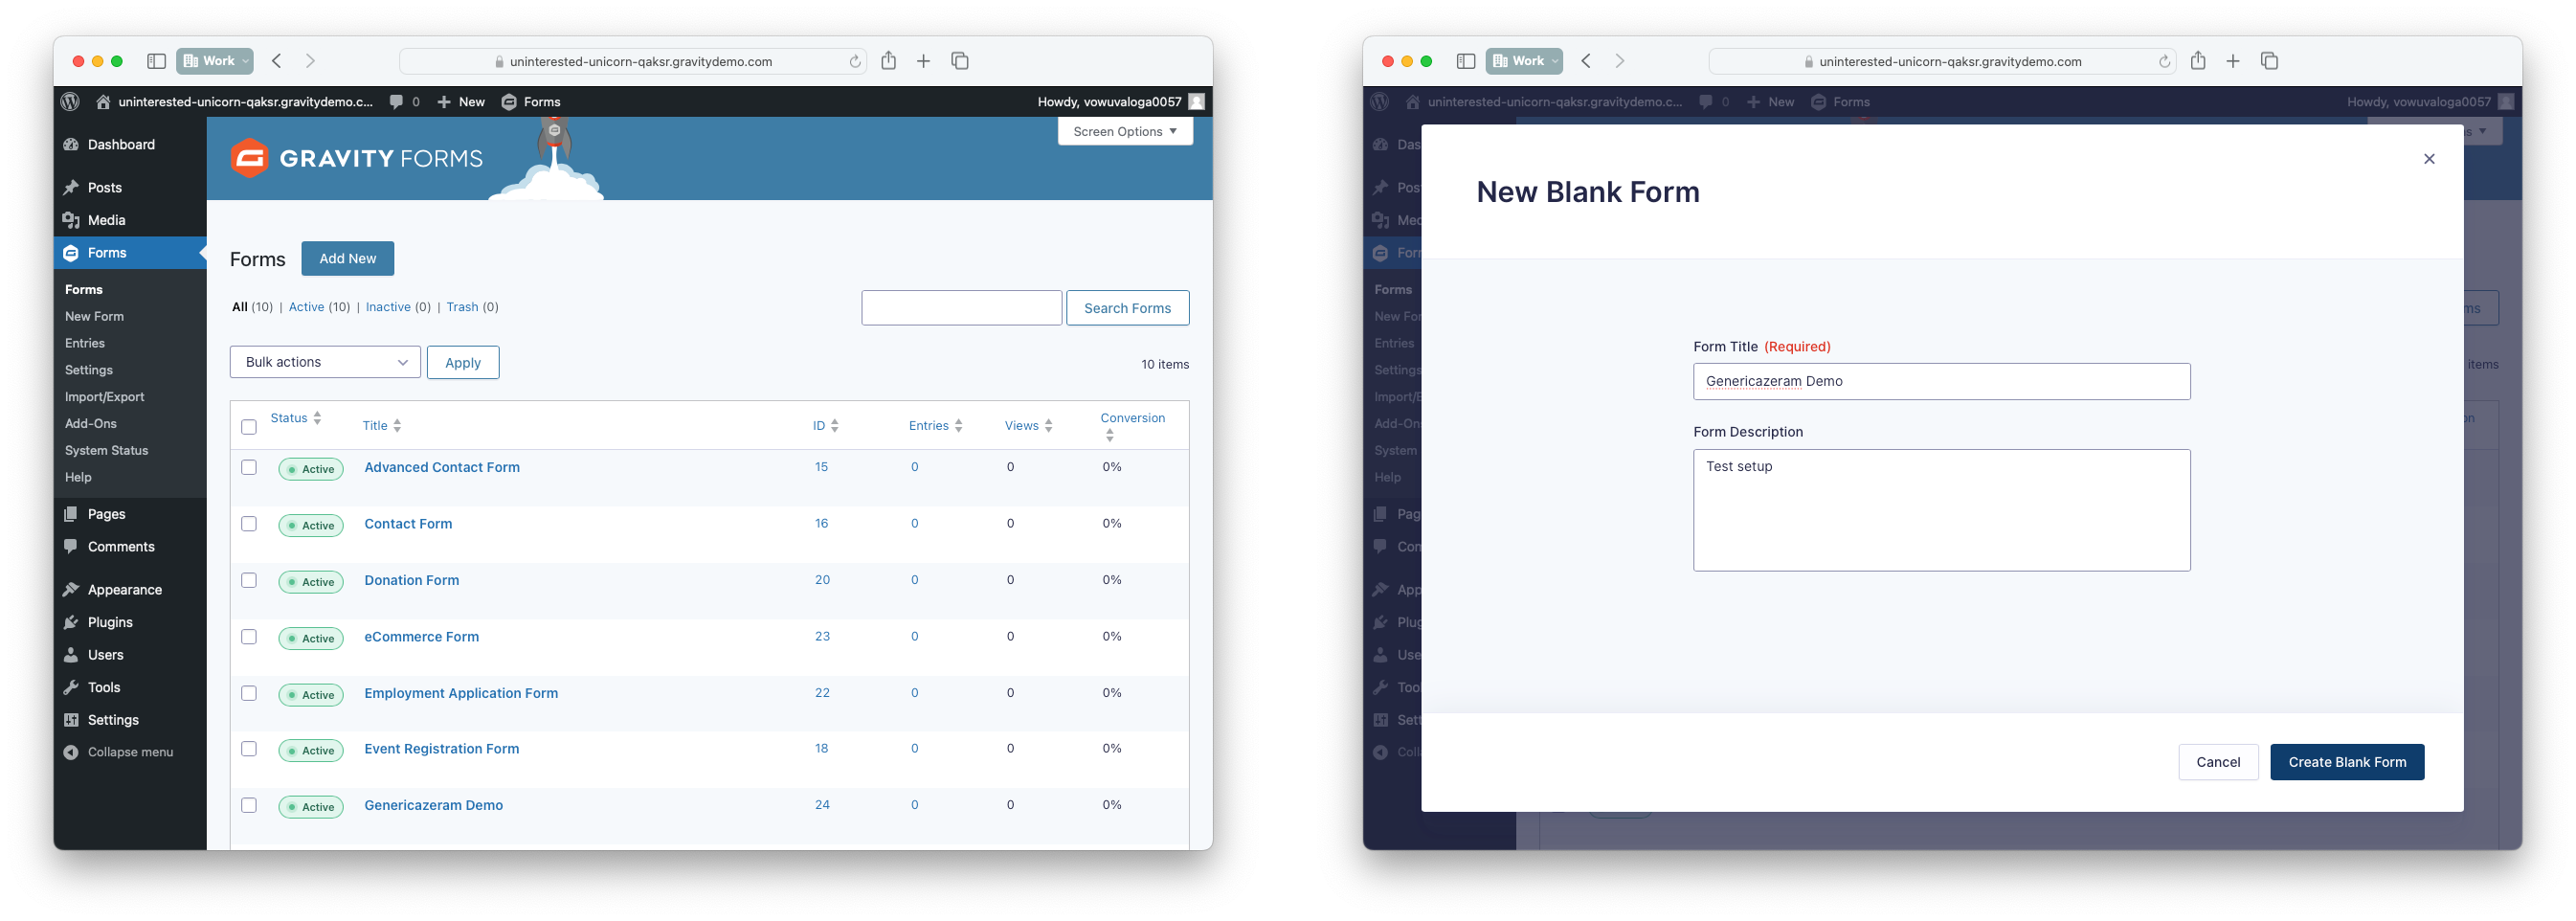
We will create a new Wordpress page where we will add our empty form.
- Navigate to
Formsin the Wordpress admin sidebar. - Click
Add New - Select
Blank form - Set the title to
Genericazeram Demoand clickCreate Blank Form
2. Setup form fields
In the previous step we added an empty form. In this step we will be adding self-assessment questions, contact information and privacy consent field.
Study setup
Self-assessment questions:
- Are you at least 30 years of age? (yes/no) [30_years]
- Do you have a doctor's diagnosis of Parkinson's disease? (yes/no) [diagnosis]
- Do your Parkinson's symptoms cause you to be wheelchair bound or bedridden? (yes/no) [wheelchair_bedridden]
- Please rate the severity of your symtoms from Parkinson's disease. (scale: 1-5) [stiffness_shaking]
Candidate fields:
- Name
- Phone number
- Postal code
- Preferrer contact time
- Preferred contact method
- Data consent
Self-assessment
The editor provides a drag and drop interface, we will add the all components for self-assessment.
- Click the
Sectionin the field selector (right side of the screen) - Click the newly added element and change the title to "Contact information"
- Now we will use three radio button fields to represent the first three questions asking yes/no questions.
- Click the
Radio Buttonfield on the right hand side. - Click the newly added
Untitledand update the field label and the choices to say "Yes" and "no" with the corresponding values "true" and "false". - In the "rules" section, make the field required to add client-side validation.
- Click the
- Clone the age-question three times and update the title.
- To represent the severity question of type scale, we will use a number input.
- Click the
Numberfield on the right hand side. - Click the newly added
Untitledand update the field label. - Set the range to be minimum, and maximum 5.
- In the "rules" section, make the field required to add client-side validation.
- Click the
- Done

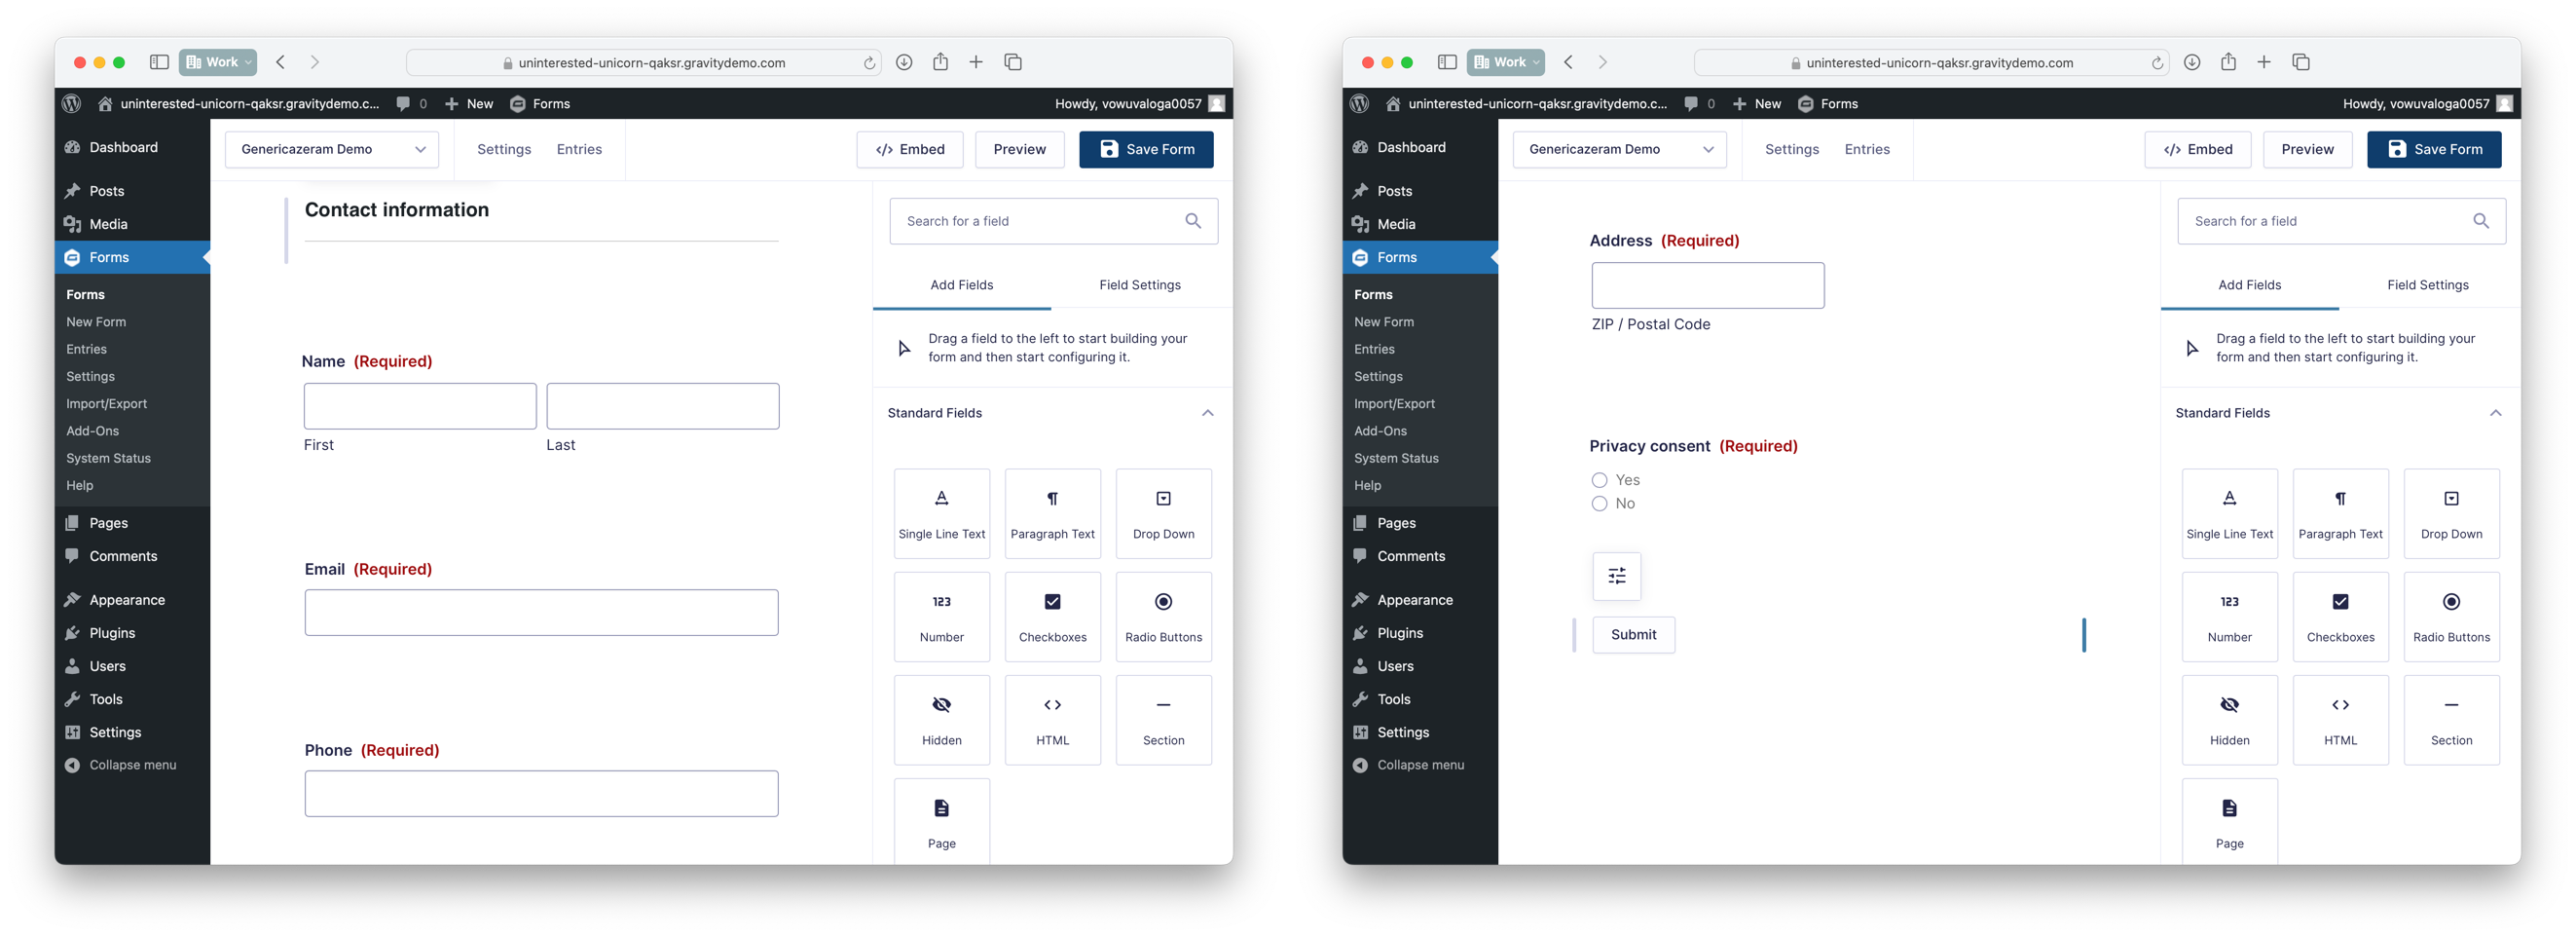
Contact information
- Click the
Sectionin the field selector (right side of the screen) - Click the newly added element and change the title to "Contact information"
- For contact information, we will be using Gravity forms advanced fields:
Name,Email,Phone numberandPostal code.- Click
Name - Click the newly added
Name. In the "rules" section, make the field required to add client-side validation.
- Click
- Repeat the previous step for
Emailand `Phone number``. Remember to make them all required. - For
Postal code, clickAddress- Remove all sub-fields except for
ZIP / Postal Code. - In the "rules" section, make the field required to add client-side validation.
- Remove all sub-fields except for
Data consent
Last, we must add input allowing the candidate to provide a consent to store their personal data.
- Now we will use a radio button field to represent the consent yes/no question.
- Click the
Radio Buttonfield on the right hand side. - Click the newly added
Untitledand update the field label to "Consent" and the choices to say "Yes" and "no" with the corresponding values "true" and "false". - In the "rules" section, make the field required to add client-side validation.
- Click the
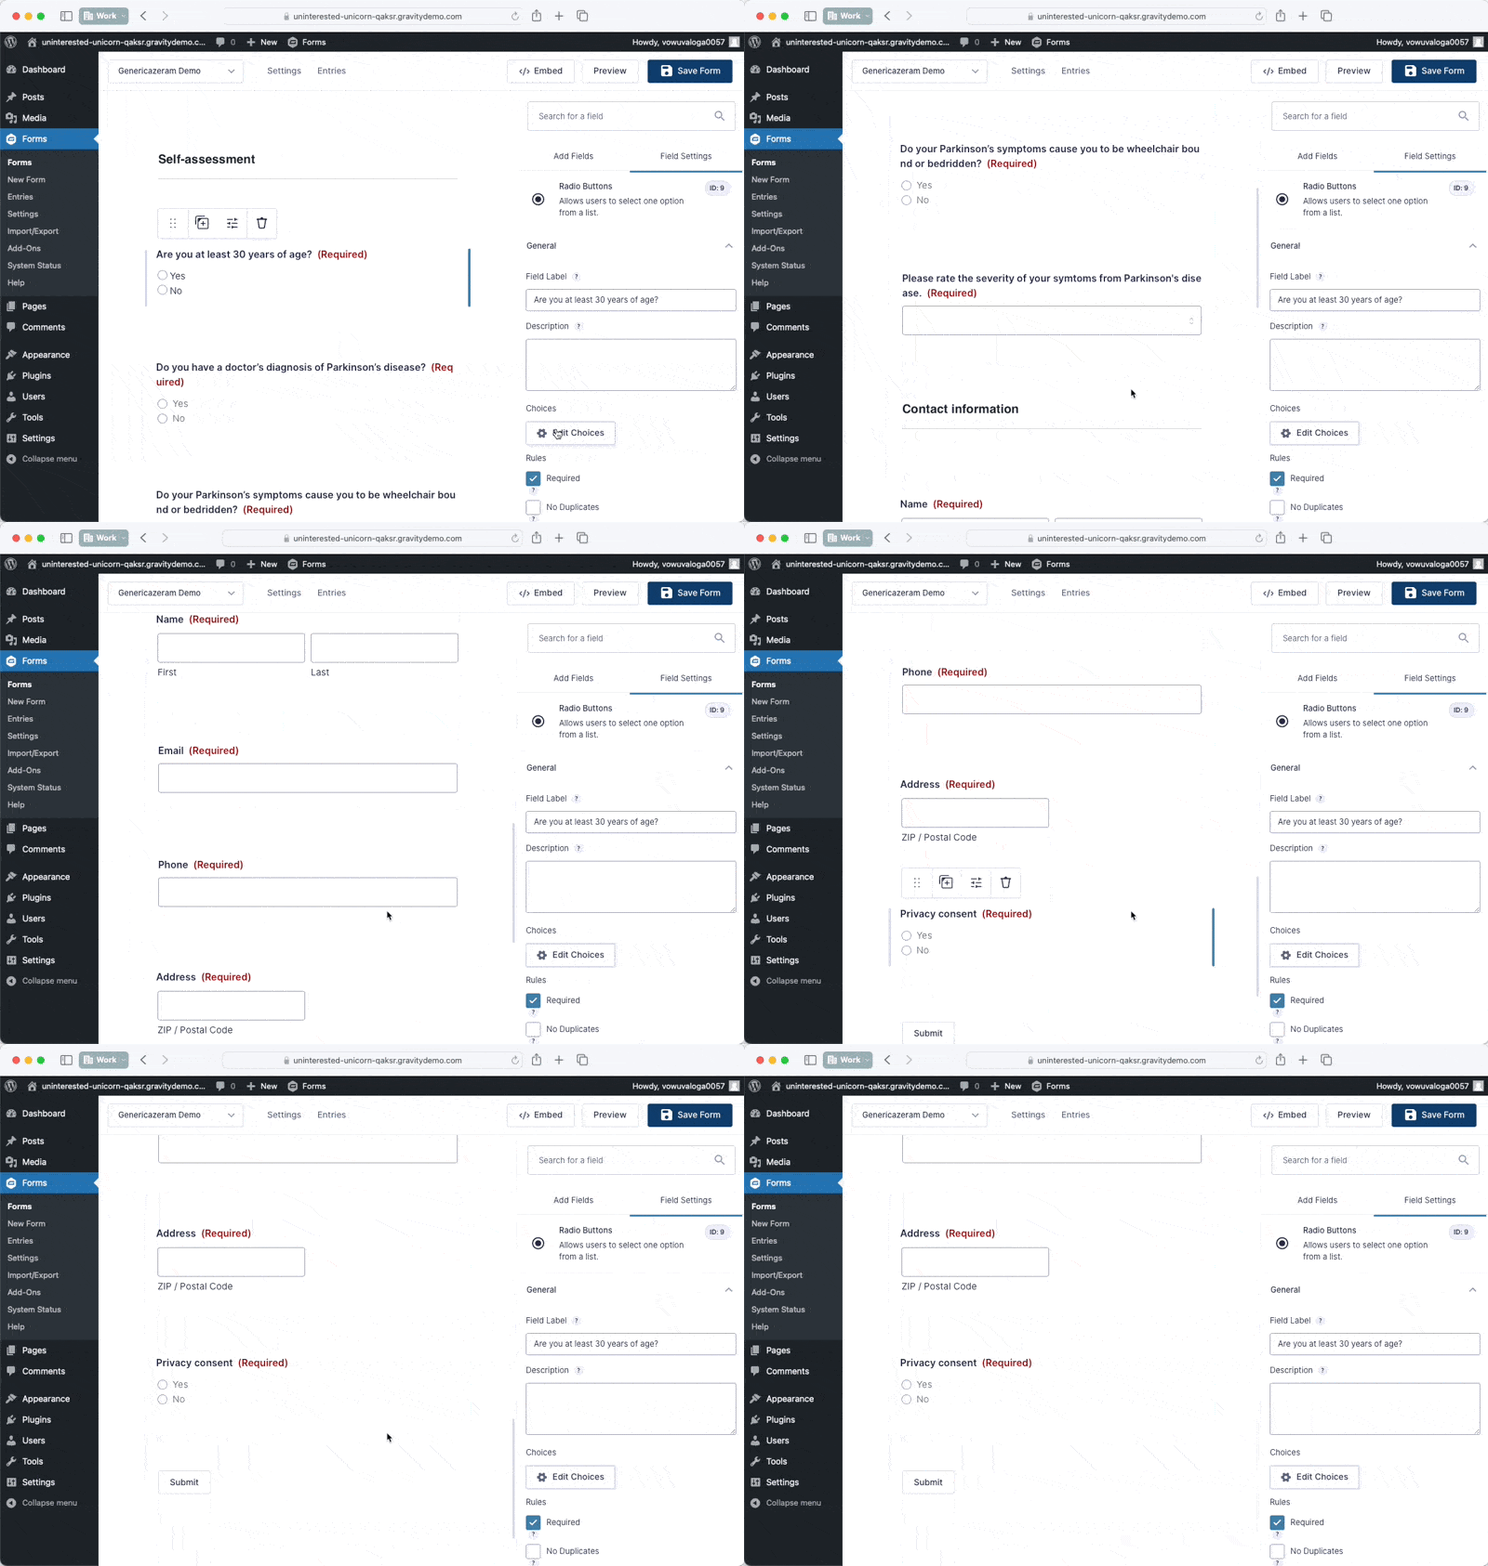
The editor should now look like:
4. Setup integration with Trialbee Honey
Gravity Forms supports sending entries to remote destinations using webhooks. In order to use this feature you first need to enable the plugin.
Enable webhook plugin
- Using the Wordpress admin sidebar, select plugins.
- Find the plugin called
Gravity Forms Webhooks Add-Onand pressActivate. - Navigate back to the form we created before using the Forms-menu item
- Hover the Genericazeram Demo and click settings.
- Click webhooks.
We need to create a new webhook that will post entries to the Candidate API.
You need an API token for the next step. Contact your assigned Trialbee Project Manager to get one.
Setup webhook
- Click
Add new - Name the hook
Trialbee Honey basic integration - Set the request URL to
https://omniapi.trialbee.com?credential=<your API token here> - Leave request method as
POSTand format toJSON - Press
Save settings
Map fields
We will stay in the webhook configuration page. In the Candidate API specification we outline blocks of similar information, i.e. candidate and selfAssessment. We can not fully use the OpenAPI specification while submitting the data to the API.
The API has an alternative dot-notation syntax which will make the integration with Gravity Forms straight forward. We need to map each form field to the corresponding API-field. In the request body, click the radio button Select Fields and start mapping them out.
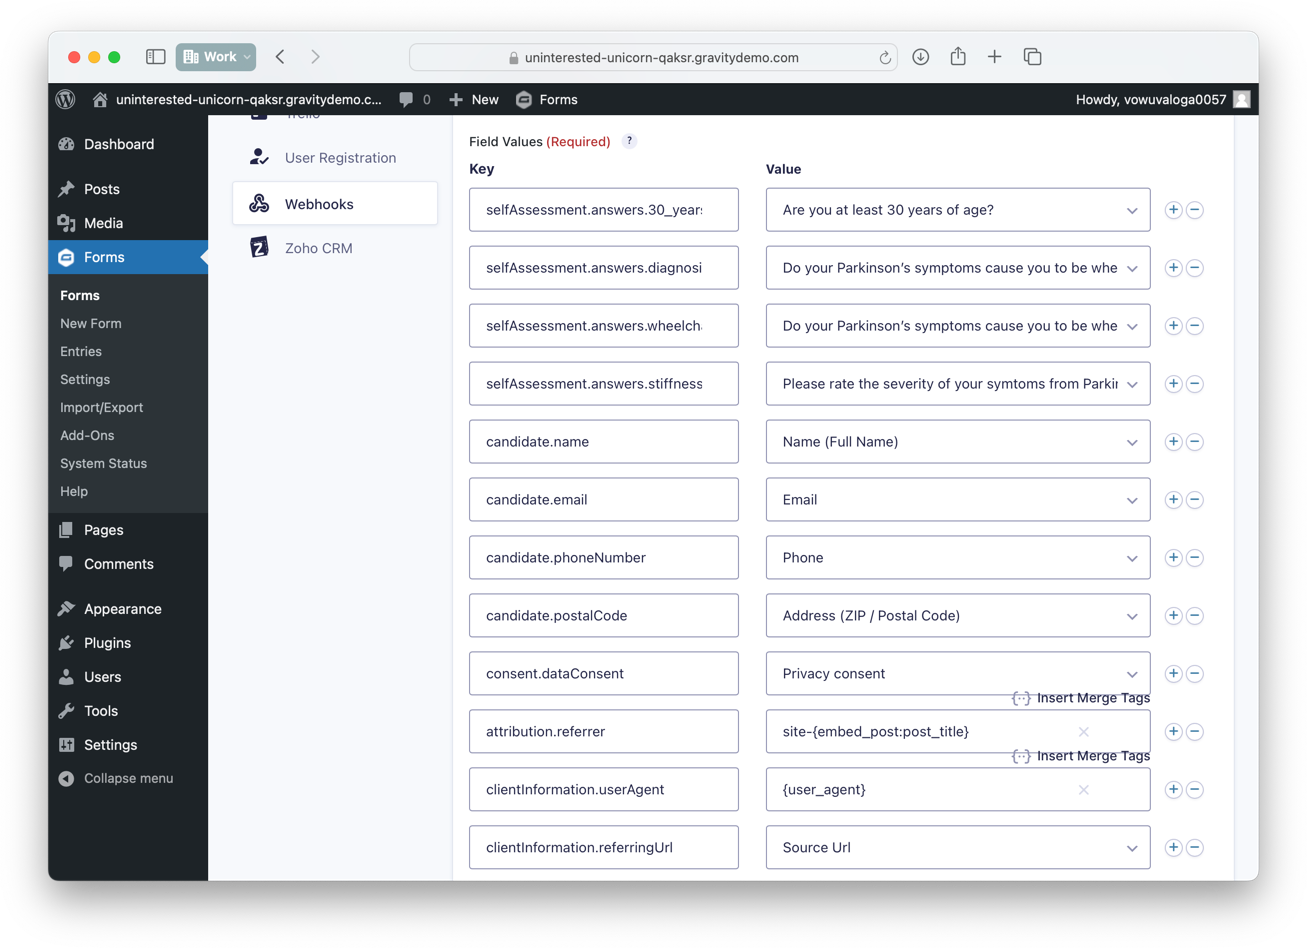
Here are the mappings we will use
| API-field | Data source |
|---|---|
selfAssessment.answers.30_years | "Are you at least 30 years..." |
selfAssessment.answers.diagnosis | "Do you have a doctor's..." |
selfAssessment.answers.wheelchair_bedridden | "Do your Parkinson's..." |
selfAssessment.answers.stiffness_shaking | "Please rate the severity..." |
candidate.name | Name (Full Name) |
candidate.email | |
candidate.phoneNumber | Phone |
candidate.postalCode | Address (ZIP / Postal Code) |
consent.dataConsent | Privacy consent |
attribution.referrer | site-{embed_post:post_title} |
clientInformation.userAgent | {user_Agent} |
clientInformation.referringUrl | Source Url |
The idea for attribution.referrer is that we take the page name and make that the referrer. If you would have multiple referrers, and they all have their separate study page, you could use this as their identifier. For the example, it is however not important.
Save the form and the setup is complete! 🐝
5. Test
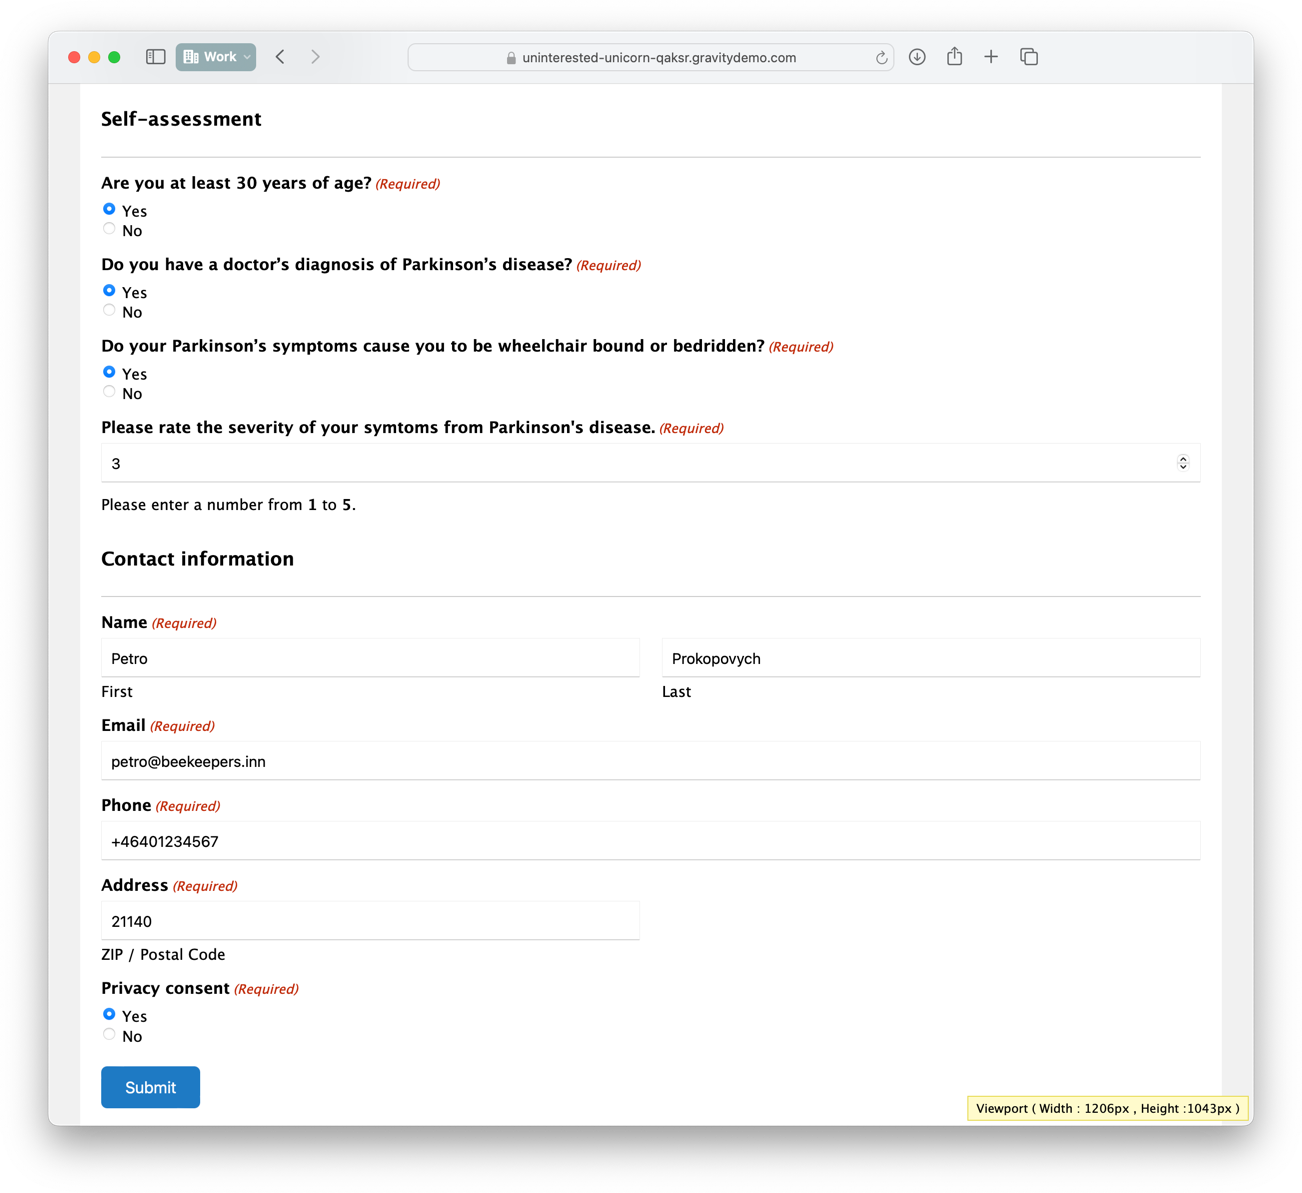
We have now completed all the steps and are therefore ready to try it out. Click Preview in top right corner of your form editor and you will see:
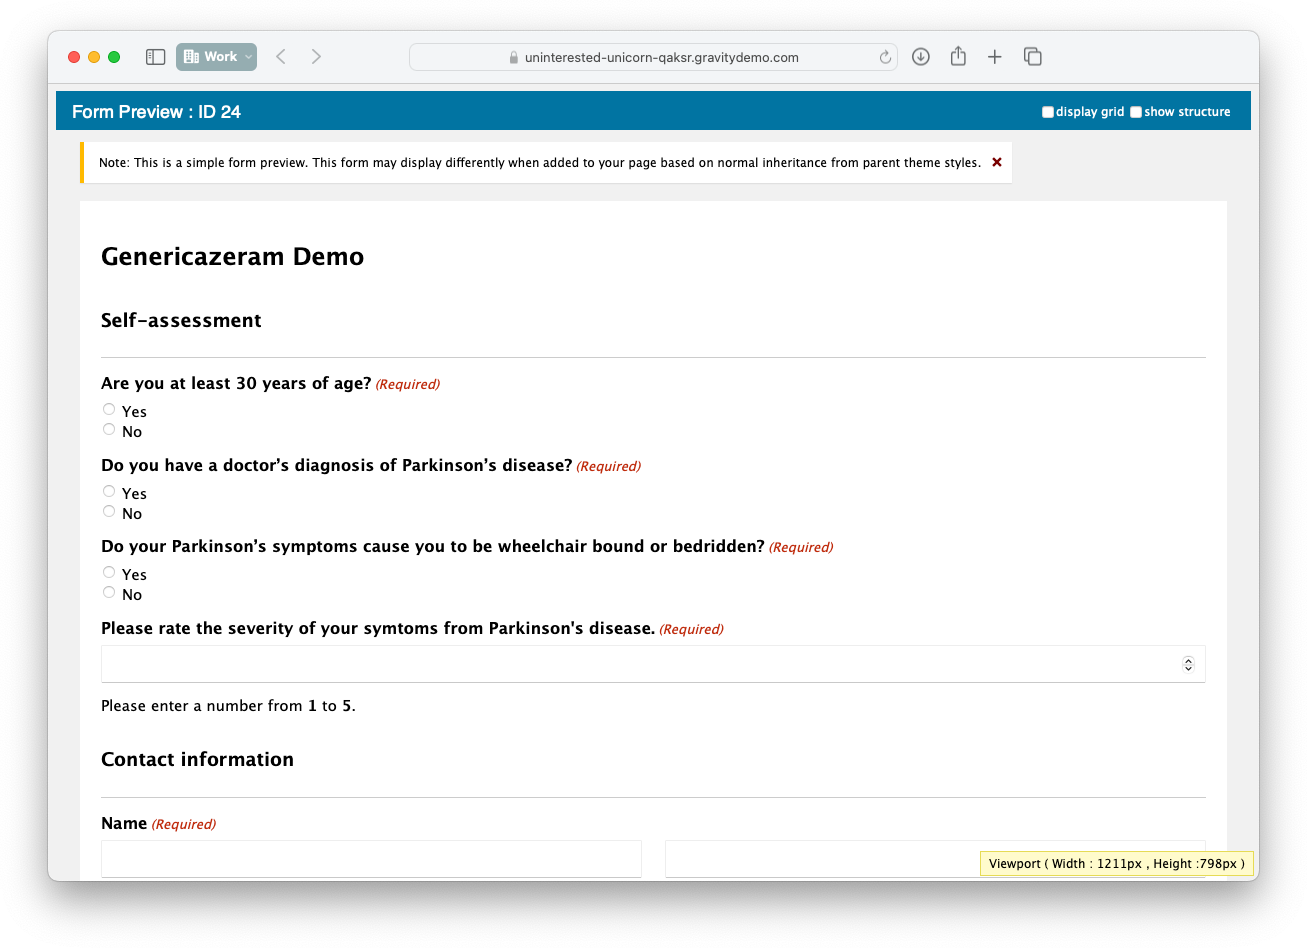
Submit details and it will be stored in Entries of Gravity Forms, but also sent via webhook to the API-endpoint.
Gravity Forms will store a copy of the submitted data by default. You must ensure that this is not against any privacy consent, GDPR or in breach with any relevant contract. Trialbee can only take responsibility for data submitted to the Candidate API and you must therefore ensure that you configure Gravity Forms accordingly.